| STEP 1 |
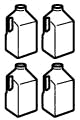 |
About 2 hours before brewing put 4 gallons of good quality water in your freezer
(allow enough time to get very cold but not quite frozen)
|
| STEP 2 | |
Wash, rinse and sanitize all equipment that will touch your beer. Use the
B-Brite to remove any soil. (see directions on B-Brite Package) For
sanitizing you may use household bleach at one teaspoon per gallon. |
| STEP 3 | 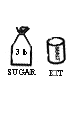 |
The beer kit is already hopped and formulated for its style.
Most kits require the addition of 2.2 lbs of corn sugar. A 3 lb bag of sugar
will leave some remaining sugar that will be needed later. Kits will have
instructions on the label, if not they will be found on the back of the label
or under the cap with the yeast. Follow these instructions for preparing kit.
**For the Deluxe Kit with grains & hops
-Mash grains for 1 hour at 160F
-Add hops at last 10 at end
of boil and steep for 10 minuets.
(These are for you to play
with. See Partial Mash Instructions.)** |
| STEP 4 |
PRIMARY FERMENTER. |
After you have prepared your wort (see kit instructions), put it
into your primary fermenter. Add enough of the ice cold water to bring it up
to your required yield. (see kit instructions). |
| STEP 5 |
 |
Check the temperature of the liquid. It should be 80oF or below. If
so, sprinkle the yeast into the liquid and stir vigorously. |
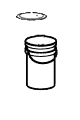
| STEP 6 |
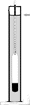
HYDROMETER & TUBE |
Take a small amount of the liquid and put it in the plastic
tube that your hydrometer came in. Just enough to make it float. Give it a
spin to remove any bubbles attached to it. Your reading is found where the
surface of the liquid meets the hydrometer. Use the S.G. (specific gravity)
scale. Adjust this for temperature using the instructions included with your
hydrometer. Note this reading as well as the Potential Alcohol reading. |
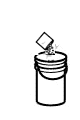
| STEP 7 |
AIRLOCK & LID |
Seal the lid of your fermenter. Wet the end of your airlock and insert it in the grommet provided
in the primary fermenter lid. Fill the airlock half way with water and replace
the dust cap. Keep the fermenter in a cool (68oF to 72oF) dark place. You will
see rapid bubbling in the airlock in a few days. This will slow dramatically
in as the fermentation continues. The liquid it being made into beer. |
| STEP 8 |
|
After about 10 days take a hydrometer reading again. Do this
every two days. If the S.G. reading doesn't change after three times, your beer is
ready to bottle. Also the difference between your first Potential Alcohol
reading and the new one gives you an idea of your alcohol content. See
the instructions included with your hydrometer. |
| STEP 9 | | When bottling, begin by washing
sanitizing and rinsing enough bottles to hold 5 gallons of beer. Use the B-Brite
along with your bottle brush to remove any soil. Then sanitize your bottles. Also, soak your bottle caps in a sanitizing solution. |
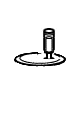
| STEP 10 |

PRIMING BUCKET WITH SPIGOT | Boil 3/4 cup corn sugar in one cup of water and
pour it into priming bucket. |
| STEP 11 |
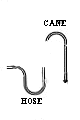 |
Attach your vinyl siphon hose to your hard plastic racking cane
with the black tip attached |
| STEP 12 | 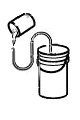 |
Place the cane in your fermenter and form a "U" out of the
hose. Fill the "U" with a few ounces of water. |
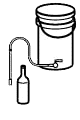
| STEP 13 | 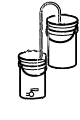 |
Place bucket on counter top and let the tubing drop into your priming bucket
located below it. The water will flow out creating a siphon sucking your
beer behind it It will mix
mixing with the sugar solution. |
| STEP 14 |
 |
Place bucket on counter top. Attach your spring-loaded bottle filler to the
hose and attach the hose to the spigot on the priming bucket. Place filler all the way down into each bottle until it touches the
bottom of the bottle.
Press the filler down against the bottom and the bottle will start to fill.
Fill the bottle to the very top, when you remove the filler
the liquid will drop to the appropriate level. Place a cap on each bottle
and secure with your bottle capper. Put the bottles away in a cool dark place and wait. (the hard part)
They should be ready to test in about 10 days. |