|
|
Home ::
Typical Wine Kit Instructions
Typical Wine Kit Instructions
Wine Art Instructions

(Be sure to clean all of your equipment. This is necessary to inhibit harmful bacteria.)
| STEP 1 |
 |
Most white wines require the addition of Glucose Solids to the primary carboy prior to commencing with our first "official" step.
First, add one quart of boiling water to the empty pail. Then add the glucose solids and stir until they are completely dissolved. Finally, add one more quart of cold water |
| STEP 2 |
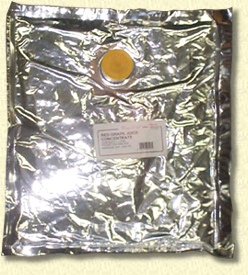 |
Grasp the bag of concentrate by the neck and remove the cap (the snap lid on this container is easily removed with the aid of a standard bottle opener). The concentrate contains a mixture of concentrated grape juice and sugar, sufficient to produce a wine with 11% alcohol.
Pour the contents into the sterilized primary fermenter, then fill the empty bag twice with water (first with warm and second with cool), emptying it both times into the primary fermenter.
Be careful when handling the bag, as it is easy to spill. Grasp it firmly by the neck, both when filling and when pouring. |
| STEP 3 |
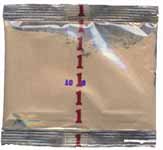 |
Now, add packet #1 from your Wine-Art wine kit to the primary fermenter. The easiest way to open this packet is by cutting the corner with a pair of scissors.
Hold the packet close to the mix as the powder tends to cloud when poured
(it's also a good idea to open all ingredient packets over the mix, in case their contents should spill).
Packet #1 contains a yeast nutrient that encourages the rapid and healthy growth of your yeast culture. It also contains a blend of tannins and acids to match the wine type you are fermenting. These tannins and acids, combined
with the type of grape from which your concentrate was extracted, produce your finished wine's unique flavor. |
| STEP 4 |
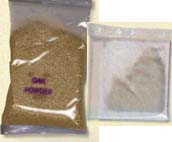 |
If your kit contains oak or flowers, it should be added to the primary fermenter now. Remember to hold the package over the pail as you open it. Stir the mix until it is well-blended. Once the mix is blended, fill the primary fermenter all the way to the 23 litre (6 gallon) level with cool water. |
| STEP 5 |
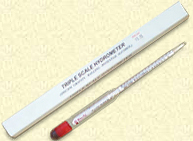 |
We recommend the use of an hydrometer (an hydrometer is included in every starter equipment kit, along with instructions in its use). During fermentation, sugars, which have a high "Specific Gravity" (or density), are converted to alcohol, which has a lower "Specific Gravity" (or density). By measuring this gravity change, an hydrometer will allow you to determine exactly when fermentation is complete, as well as the potential and actual alcoholic content of the wine.
If you are using an hydrometer, the Specific Gravity should be approximately 1.080. If the specific gravity is less, you simply need to stir the mix a little longer. |
| STEP 6 |
 |
Make certain that the temperature of the mix does not exceed 25 degrees Celsius (77 degrees Fahrenheit). f your temperature is fine, add the yeast now. |
| STEP 5 |
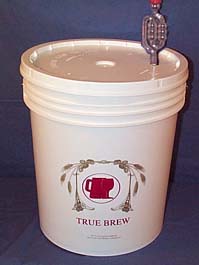 |
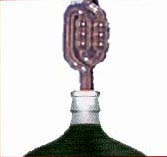
Now that the yeast has been added it is time to seal up your primary fermenter. Before you put the lid on, install the airlock. Do not try to install the airlock with the lid on your fermenter. You will see grommet provided in the lid for your fermantation lock. Fit the lock snugly into the grommet. Put the lid on the fermenter. Make sure that the lid is on tight. Take the lock and remove the red cap and half-fill the lock with water. When the lock is filled half-way with water, replace
the cap The fermentation lock is designed to prevent air and bacteria from getting into your wine, while allowing carbon dioxide gas, produced during fermentation, to escape.
The primary fermenter must now be placed in a warm area. Ideal temperature is between 21 and 24 degrees Celsius (70 to 75 degrees Fahrenheit). It will be left there for between six and eight days. Generally, the lower the fermenting temperature, the longer you should leave it. (At the end of the period, Specific Gravity should be 1.005 or below.)
Your Wine-Art, Four Week wine kit is designed to be fermented at a room temperature of about 21 degrees Celsius (70 degrees Fahrenheit). It is possible to
ferment wine at temperatures as low as 15 degrees Celsius (60 degrees Fahrenheit) but fermentation time will increase. |

| STEP 1 |
 |
First, make sure you sanitize the carboy with your
sanitizing solution and rinse it with water.
If you have an hydrometer, you should also check to insure that the Specific Gravity (S.G.) of the mix has fallen to 1.005 or less.
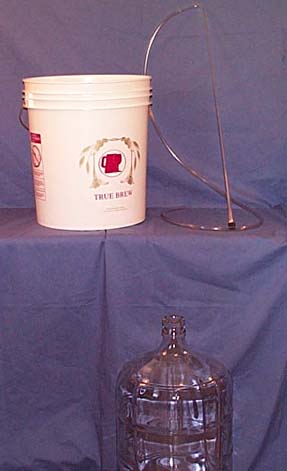
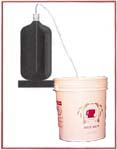
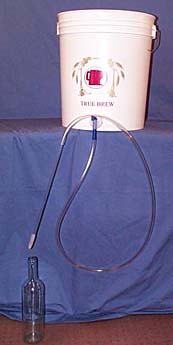
Syphon the wine from the primary fermenter into the carboy. You will need to raise the primary fermenter to height taller than your carboy (placing
it on a table should suffice). It's heavy, so if you need help, get someone to assist you. Be careful not to shake the contents around too much
Once your primary is resting on the table, attach the siphon hose to the racking tube and insert the racking tube into the pail. The racking tube is designed to keep the mouth of the hose above the sediment (ensuring that the sediment is left behind). |
| STEP 2 |
 |
To start your sypon let the hose drape down the side of the fermenter. Pick up the open end forming a "U" with the hose. Take a small amount of boiled water and allow it to cool. Fill the "U" with the water. Pinch the opening closed and put it in the mouth of your carboy then release. The water will run out and start siphoning the wine behind it. |
| STEP 3 |
 |
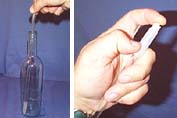
Packet #2, containing Bentonite, must now be mixed and added to the wine (Bentonite aids in clarifying white wines). Mix the Bentonite powder with water in the manner of your choosing, prior to adding it to the wine.
The simplest method is to add the Bentonite to a sanitize, 750ml (26oz.) bottle, half filled with warm to hot water, and shake for two to three minutes. If you prefer, you can pour 375ml (13oz.) of hot water into a blender, along with the Bentonite, and blend until both are mixed. |
| STEP 4 |
 |
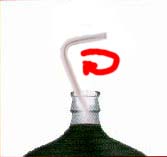
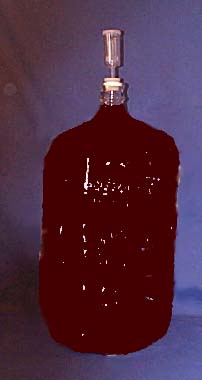
In a pot or kettle, boil enough water to fill the remainder of the carboy. The purpose of boiling is to kill any bacteria in the water which may interfere with fermentation). DO NOT POUR THE WATER INTO THE CARBOY WHILE IT IS STILL HOT! Allow it to cool. When the water has returned to room temperature, top-up the carboy to the base of the neck (about a half-inch below the lower ridge on a Wine-Art carboy). Leave enough space to fit the fermentation lock and stopper (bung).
When the carboy has been topped-up, seal the stopper (bung) into the mouth of the carboy. The hole in the middle of the stopper is where the fermentation lock will be inserted.
The fermentation lock is designed to prevent air and bacteria from getting
into your wine, while allowing carbon dioxide gas, produced during fermentation, to escape.
To fit the lock to the carboy, first remove the cap and half-fill the lock with water. You will note that the fermentation lock has a hair-line marking to indicate the proper water-level. When the lock is filled half-way with water, replace the cap and fit the lock snugly into the stopper, in the carboy neck.
The final step for today: simply place the carboy in a warm place. A temperature range of 21 to 25 degrees Celsius (or 70 to 77 degrees Fahrenheit) is best to ensure quick and complete fermentation. (a lower temperature will slow the fermenting process). The carboy will remain there for the next 12 days. |

| STEP 1 |
 |
You are now only ten days away from your own home-made wine. All fermentation should now be complete (Specific Gravity should read .996 or less). Before we begin, make certain you have cleaned the primary fermenter. Siphon the wine off the sediment in the carboy into the primary fermenter, then wash and sanitize the carboy. Immediately siphon the wine back into the clean carboy. It is important to complete this process in one step, and relatively quickly, so as to prevent the wine from oxidizing while in the primary (pail) fermenter. |
| STEP 2 |
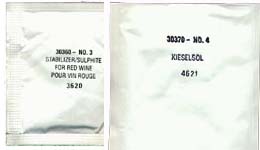 |
Now, add packet #3 and packet #4 (containing wine stabilizers) to the carboy and stir thoroughly for three minutes. |
| STEP 3 |
 |
Over the next 24 hours, the wine must be stirred vigorously at least six times (letting the wine rest several hours between stirrings), three minutes at a time. This is necessary if the unwanted carbon dioxide gas is to be removed before bottling. You may use your racking cane to do this or a long thin spoon.
Be certain to re-attach the lock after each stirring!
Prior to stirring the wine for the last time, add to the carboy the contents of Packet #5 and stir gently for 30 seconds. |
| STEP 4 |
 |
Place the carboy on a table or counter so that the sediment will not be disturbed prior to bottling. It will stay in this spot for the next 10 to 17 days. To make certain that all of the sediment falls to the bottom, you might try giving the carboy a sharp twist on day 22 or 23 (three or four days from now). This will dislodge any particles clinging to its sides. |

| STEP 1 |
|
Before we take our final steps in the wine-making process, check the wine in the carboy to be certain it has cleared. If the wine still seems cloudy; no problem. Just leave it there for another week to ten days, or until it has become clear (which may be sooner). |
| STEP 2 |
|
We will now siphon the wine off the sediment and back into the primary fermenter. Again, make certain you have cleaned the primary fermenter. Extreme care must be taken to siphon only the clear wine. Your wine is now ready for bottling. |
| STEP 3 |
 |
Your wine is drinkable when bottled but will keep and improve with aging. To place the wine in bottles, raise your primary fermenter and attach your hose to the bottling spigot on the primary fermenter and place your bottle filler on the other end of the hose. |
| STEP 4 |
 |
Then turn on the spigot and fill each bottle by pressing the filler against the bottom of the bottle. There is a spring loaded valve in the bottom of the filler, the wine will flow until the you stop pressing. |
| STEP 5 |
 |
Then cork. Make certain your bottles are clean and sterile. |
| STEP 6 |
 |
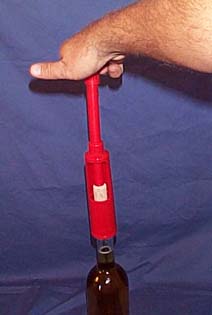
If you are using straight wine corks, you will need a corking machine. Any cork should besoaked for 5 minutes (to soften) prior to insertion. Simply bring a pot of water to boil, remove it from the heat, and toss in your corks. Allow them to sit for 5 minutes then pour out all of the water (so as not to over-soak).
Bottles with corks should stand upright for ten days before being stored on their sides. |
|