Beer Line Cleaning Kit Instructions
We recommend you clean your lines every two to three kegs to prevent the growth of yeast and bacteria that could effect the flavor of the beer and to keep the system running efficiently.
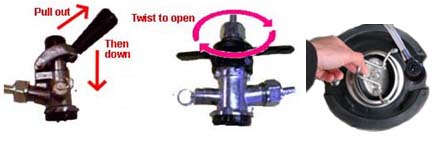
Step 1
Take your tap and place in a clean bucket in the open position. If you have a homebrew/soda system, connect your liquid line out to a empty keg and open the closure hatch.
Note:
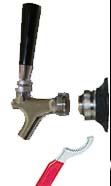
Some taps, not all, are equipped with a check valve in the beer out connection. Check to see if your tap has this by removing the beer line nut and looking into the taps beer out connection. The check valve is nothing more than a small plastic ball and retainer. The retainer is easily removed with needle nose pliers or tweezers. Remove the retainer and ball and replace the beer line. Replace the plastic ball and retainer after cleaning. |
 |
|
 |
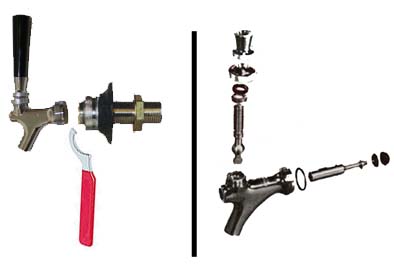
Step 2
Remove the faucet from your shank. Dismantle your faucet completely and soak the part in the recommended concentration of the cleaning solution. The faucet wrench will help loosen the coupling nut. The coupling nut will have holes for the wrench to grab with the pin at the end of it's curved cradle. |
 |
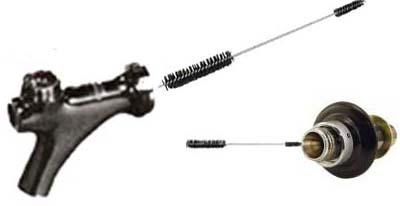
Step 3
While soaking these parts run the large end of brush though the entire faucet body to loosen any soil. Then continue soaking the faucet body. Use the small end of the brush to loosen any soil through the length of the shank. |
 |
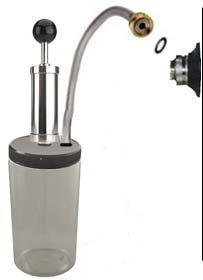
Step 4
Fill your pump station jar with the recommended concentration of the cleaning solution and connect the fitting on the hose to the shank that you removed the faucet from. Pump the solution through the shank, line and tap followed by two full jars of water.
(Always hold the pump body while pumping to prevent undue stress on the jars lid) |
 |
Step5
Rinse and reassemble your faucet and return it to the shank. Use the faucet wrench to tighten the faucet. Don not over tighten the coupling nut. This could damage the o-ring that makes the seal. |
 |