| STEP 1 |  |
If you are using liquid yeast it is necessary to start your yeast a day to several days before you start to brew. see the package for instructions. |
| STEP 2 | 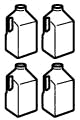 |
About 2 hours before brewing put 4 gallons of good quality water in your freezer (allow enough time to get very cold but not quite frozen). |
| STEP 3 | |
Wash, rinse and sanitize all equipment that will touch your beer.(for sanitizing you may use household bleach at one teaspoon per gallon or Amberdyne at 1/2 tsp. per gallon.) |
| STEP 4 | 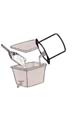 |
Bring one gallon of good quality water to 160oF in your brew pot. Add gypsum if required. Pour this water into the Handy Masher on top of your cracked grains. Put the lid on the Handy Masher and let it steep for 60 minutes. |
| STEP 5 |  |
In another pot, 15 minutes before the grains are done steeping, bring one gallon of good quality drinking water
to 170oF. |
| STEP 6 | 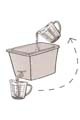 |
Remove the lid of the Handy Masher and drain about a cup of the wort from the tap. Pour the wort over the top of the grain. (This will remove any particles that may have slipped through the screen). |
| STEP 7 | |
Reopen the tap and drain the wort into your brew pot lifting the rear of the Handy Masher to help drain it thoroughly. |
| STEP 8 | 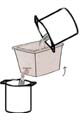 |
Leaving the spigot open and lifting the rear of the Handy Masher, sparge the grain with the 170 F water from step 5 into your brew pot. |
| STEP 9 | 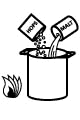 |
Add your malt extract and stir well until it is completely dissolved. Place pot on burner and bring the dissolved extract and liquid to a boil. Boil for one hour adding hops, as your recipe requires. During the boil your recipe may call for the addition of other adjuncts and/or additives such as Irish Moss, Gypsum, specialty sugars, as well other hopings. Just add at the times the recipe requires. |
| STEP 10 |  |
At the end of your one hour of boiling, remove the pot and place it in a sink full of water. This will start cooling your wort. |
| STEP 11 | 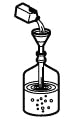 |
Fill the carboy with 2 gallons of near freezing water. |
STEP 12 | 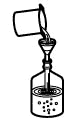 |
Strain the wort through the colander and large funnel with filter screen into the carboy. (If you are using pellet hops do not strain with colander and screen. Just pour right in carboy using funnel alone.) |
| STEP 13 | |
Add enough water to carboy to fill it almost to the top. Place sanitized solid rubber stopper on carboy and shake well. (At this point you may notice some solids forming in your beer. this is called "cold break". These are proteins that fall out of solution and settle to the bottom as your beer comes to an even temperature. This helps prevent "chill haze" and should give you a nice, clear beer. |
| STEP 14 | |
Take a temperature and hydrometer reading. |
| STEP 15 | |
IF your beer temperature is below 80oF, pitch (add) your yeast. (DO NOT add your yeast until temperature is below 80oF!) Top off carboy completely with cold water. |
| STEP 16 |
 |
Insert stopper end of JTS Glass Blowoff Tube in carboy. Place other end in a bucket of water (end should be under water 1 inch). Put carboy, JTS tube and bucket in a cool dark place. Using the "Swamp" method is recommended in warmer areas to help lower fermentation temperature. |
| STEP 17 |  |
"The Swamp"- The ideal temperature for most ales is 68-70oF. To help achieve this you can place your carboy in a large basin or tub (We call this a "Swamp"). Fill the basin with about 4 inches of water. Wrap a dark towel around the carboy and soak it with water. The water from the basin will wick up about half way up the towel, the upper portion of the towel will have to soaked every day. The evaporating water will drop the temperature of the carboy 4 to 10 degrees and will help your beer considerably. |
| STEP 18 | |
Fermentation should begin within a day and eventually "Barm" or the froth on top of your fermenting
beer will blow off through the tube leaving a little behind. When stops flowing through the tube, remove the tube replace with the airlock. This should happen after 3 or 4 days. |
| STEP 19 | 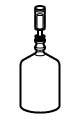 |
You can test for complete fermentation in one of two ways. When time between bubbles in the airlock is 2 minutes or greater, you can take a hydrometer reading. Take another 24 hours later. If the two readings are the same, fermentation is complete. The alternative is to assume that when the time between bubbles is 2 minutes or greater, fermentation is complete. This reduces the risk of infection from multiple hydrometer readings. |
| STEP 20 | |
Another clue that fermentation is complete is to notice the clarity of your beer. It will begin as a cloudy or milky liquid and will slowly clear from top to bottom. When it is clear all the way to the bottom fermentation is usually done. This will take between 10 and 21 days. |